Final Animations
2D Animation
From the outset, I knew I wanted to create a venue concept that reflects the immersive and futuristic qualities of VR (Virtual Reality) and AR (Augmented Reality) spaces. These technologies are not only fascinating but also have significant potential in both entertainment and practical applications. My 2D animation project aimed to capture this dual-purpose nature through a short, engaging sequence.
I began the process by sketching a storyboard that featured a character walking past the front of several buildings. To ensure realistic movement and proportions, I asked my partner to record me walking, which I then used for rotoscoping. By tracing over each frame of the video, I was able to produce a smooth and natural walk cycle. I animated the character walking in one direction, then looking up and turning to enter a building—creating the illusion of transitioning into a new space.
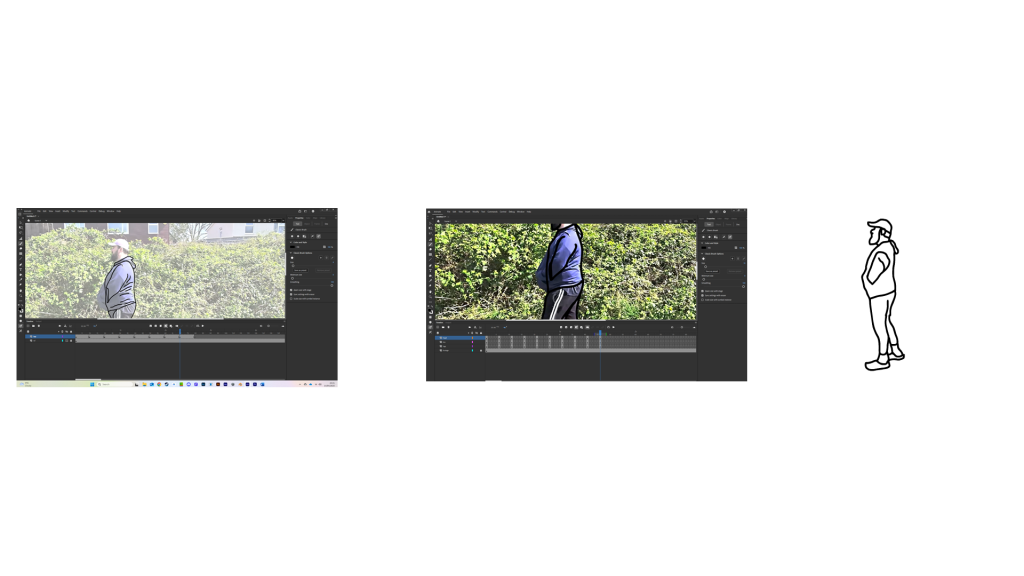
Initially, I planned for the VR environment to blend seamlessly into the facades of existing buildings. However, I found that rotoscoping complex architectural elements was too challenging within the time constraints. As a creative solution, I instead illustrated a field environment and designed a sci-fi-style portal for the character to walk through. This maintained the futuristic tone while simplifying the scene.
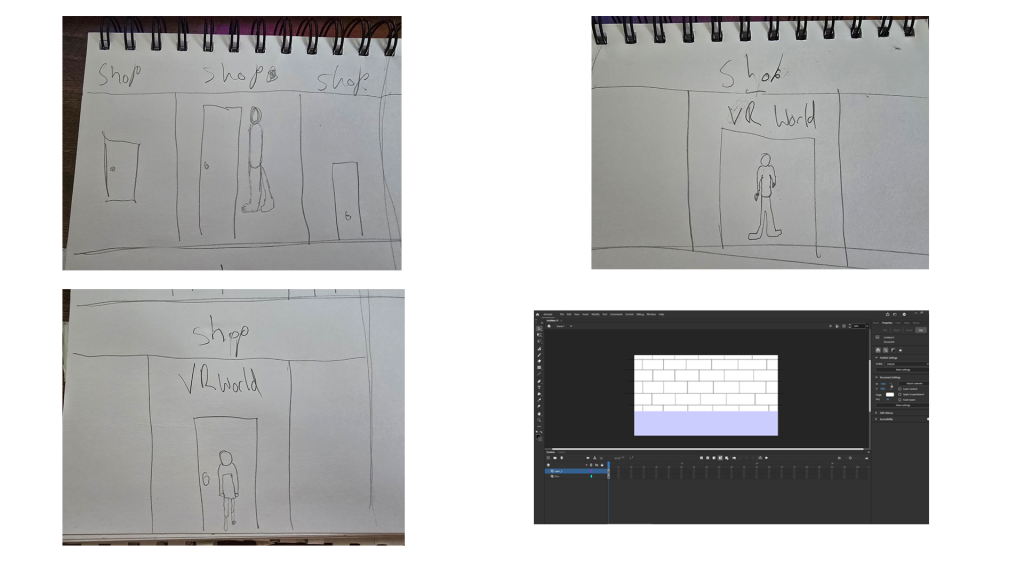
Throughout the animation process, I gained a much deeper appreciation for the complexities of frame-by-frame animation. Not only is it time-intensive, but it also requires careful attention to movement and continuity. To make the animation interactive, I incorporated a clickable button that allows the user to finish the animation. This approach could be used in interactive advertisements or digital storytelling by graphic designers seeking to engage audiences more dynamically.

Overall, the project has enhanced my understanding of 2D animation, interactivity, and visual storytelling within digital media.
3D Blender Models
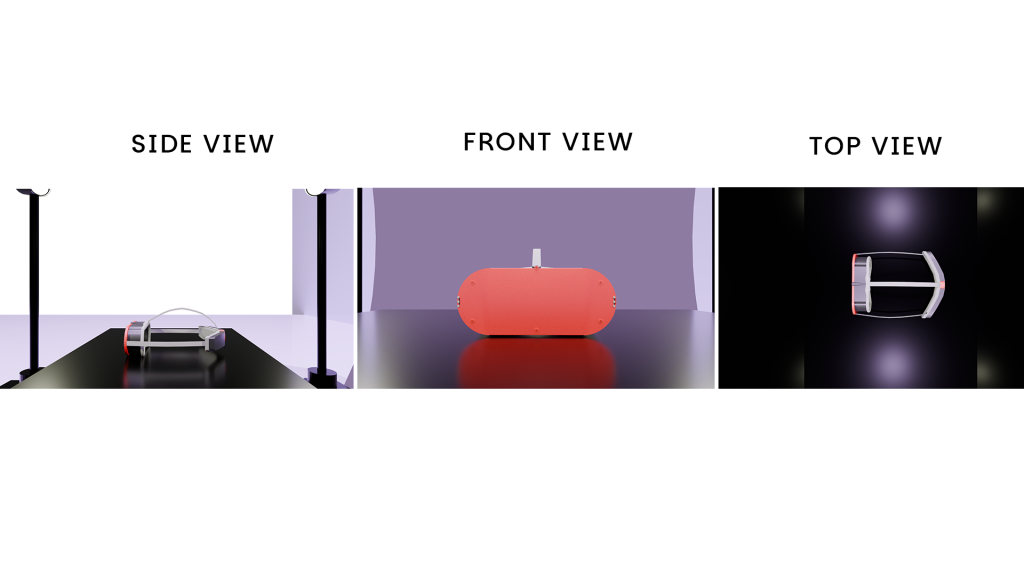
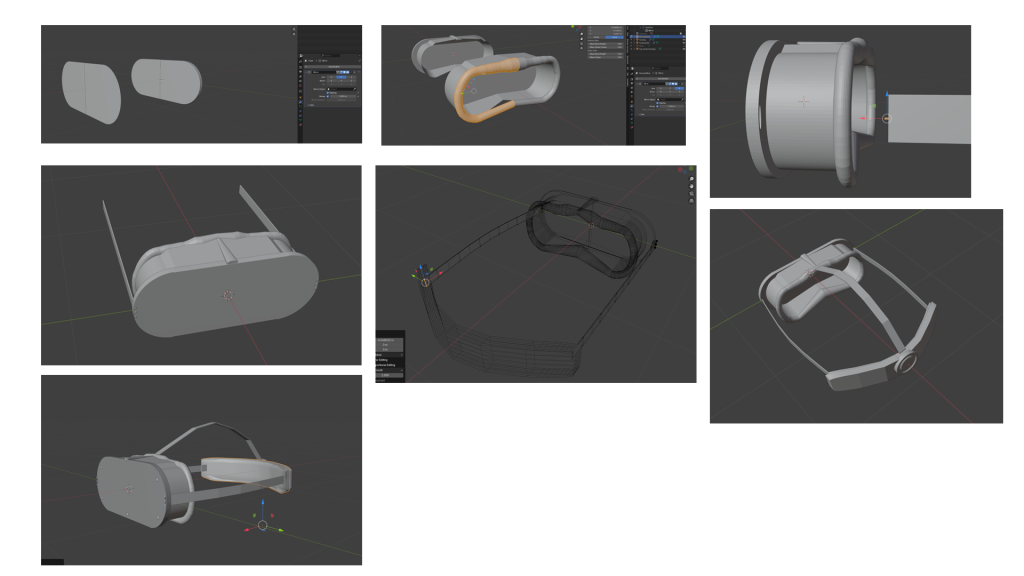
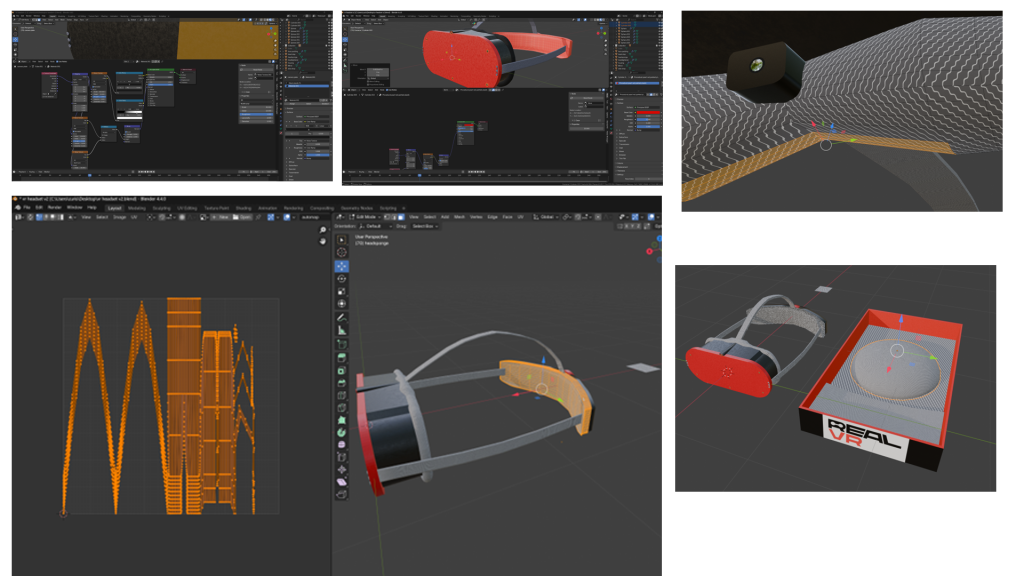
For the first model, I decided to create a virtual reality (VR) headset based on a previous concept I developed that involves using a miniature projector and a mirror to deliver the visual image to the user. I broke the headset down into key components: the front panel with integrated cameras, the main body of the headset, the face padding, an internal mirror, a projector mounted at the top interior to project forwards, the head straps, and finally, the back casing which includes an adjustment dial. The rationale behind this modular design is to reduce both cost and weight while preserving image quality and sharpness.
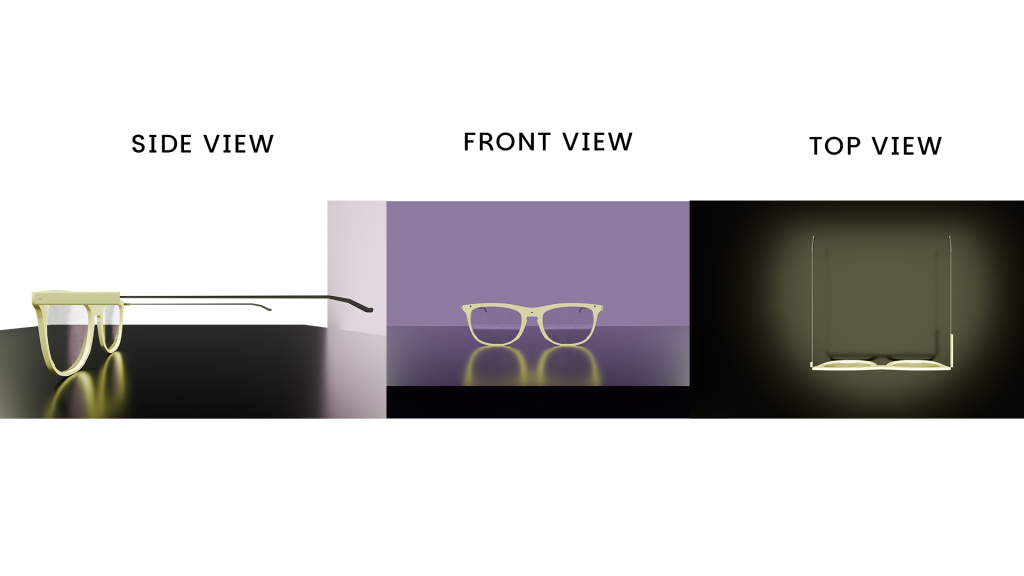
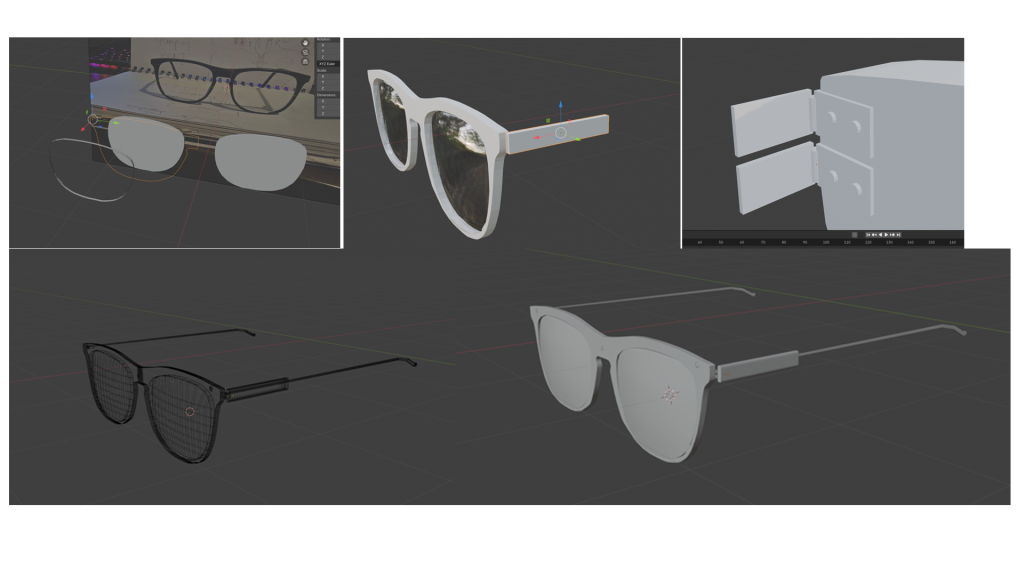
For the second model, I designed a pair of augmented reality (AR) glasses intended to be lightweight and functional. The design accommodates a Texas Instruments Dart-4460 embedded computer on one side and a compartment for Bluetooth and wireless fidelity (Wi-Fi) modules on the other. The glasses include three front-facing cameras that capture the environment and feed visual input into the internal display system. All necessary cabling is concealed within the upper frame of the glasses, providing protection from environmental elements and contributing to water and dust resistance. Additionally, the cameras are capable of recognising hand gestures. The integrated Wi-Fi module allows the glasses to connect to a smartphone via a companion application, enabling users to receive notifications or engage in more intensive tasks such as playing AR games.
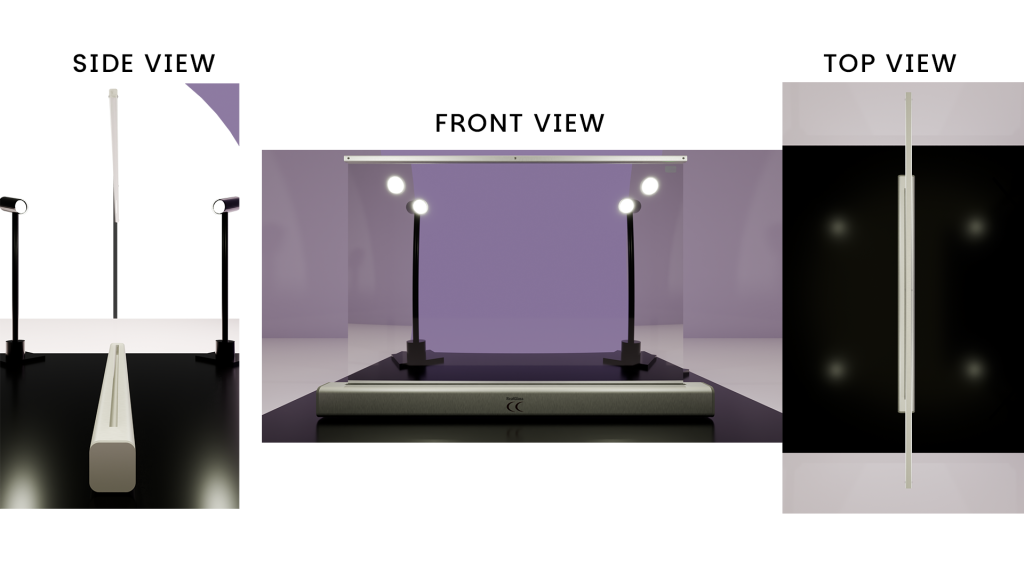
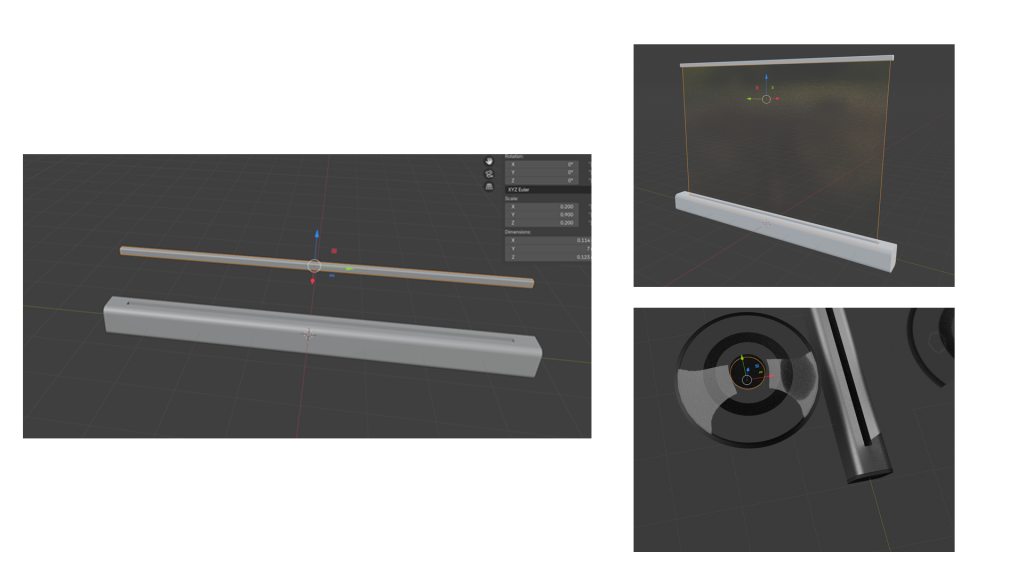
For the final model, I conceptualised a piece of emerging technology that, while feasible, has not yet been realised: a large-scale augmented reality interface. In this model, the user can position a horizontal bar and extend a rollable sheet of flexible glass, supported by structural bars on each side when deployed. Using light detection and ranging (LiDAR) sensors and cameras, the system maps the user’s living room and projects it onto the screen. The user can then stand on the opposite side and interact with the virtual representation of the space.
3D Texturing and Concept Render
Blender’s robust toolset makes the process of UV unwrapping and texturing efficient and user-friendly. To begin texturing my models, I set up three dedicated workspaces in Blender: one for viewing and positioning the 3D product, another for UV editing, and a third for working within the Shader Editor. This layout allowed for streamlined navigation between tasks and improved control over the detailing process.
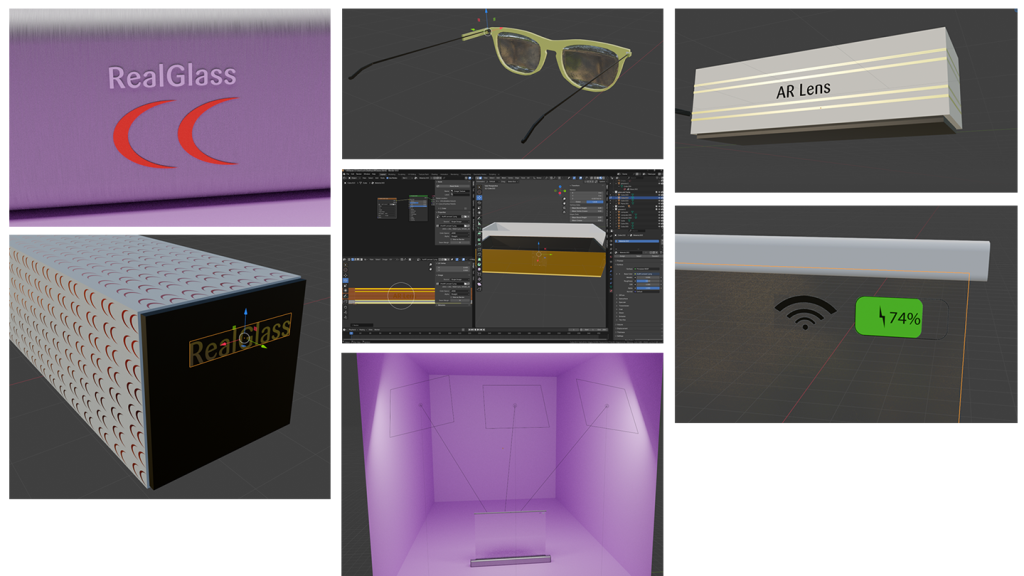
I UV unwrapped each model in Edit Mode, carefully selecting edge loops to create clean, efficient UV islands. This was particularly important for ensuring that the textures would apply correctly without stretching or distortion. Once unwrapped, I selected specific faces where textures or images needed to be applied. For example, the branding and display elements were placed on clearly visible surfaces, such as the front panel of the VR (Virtual Reality) headset or the lens area of the AR (Augmented Reality) glasses.
I used a combination of procedural textures created within Blender’s node system and custom image textures made in Adobe Photoshop. These textures were applied based on material requirements—plastic for casing, fabric for padding, metal for fastenings, and glass or reflective shaders for lenses and mirrors. The mirror material for the VR headset was developed using a reflective node setup, while the AR glasses and the conceptual RealGlass device used transparent and glossy shader combinations to simulate realistic glass surfaces.
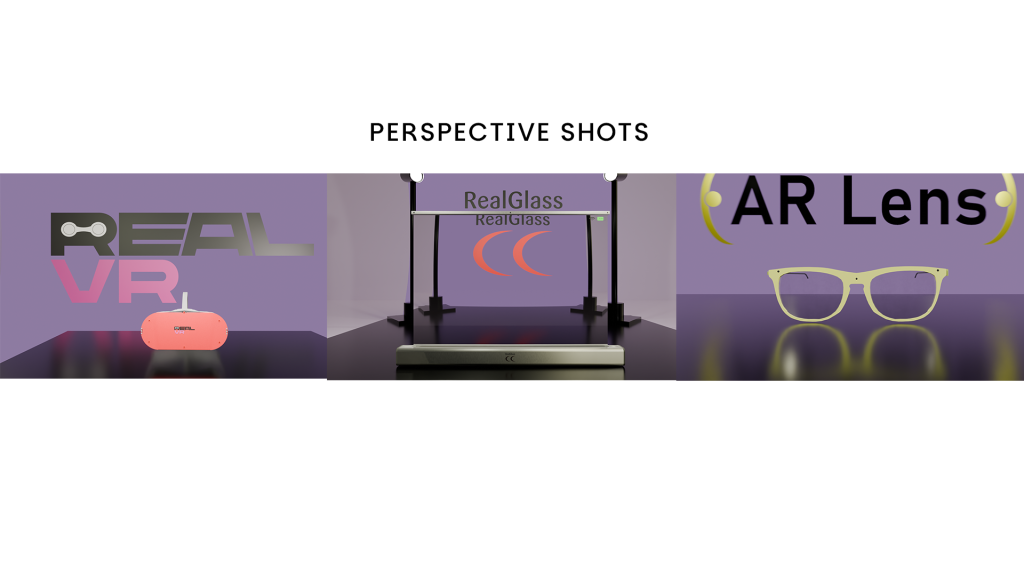
Each material was assigned to its respective model part and tested using the rendered viewport to ensure accurate lighting and realism. This approach helped bring each concept closer to production-quality visualisation. The final renders include one perspective shot and three orthographic projections (front, top, and side) to fully demonstrate the model’s form and detailing. Development screenshots, including wireframes and UV layouts, support the process and show progression from raw model to textured asset.
3D Animation and Lighting
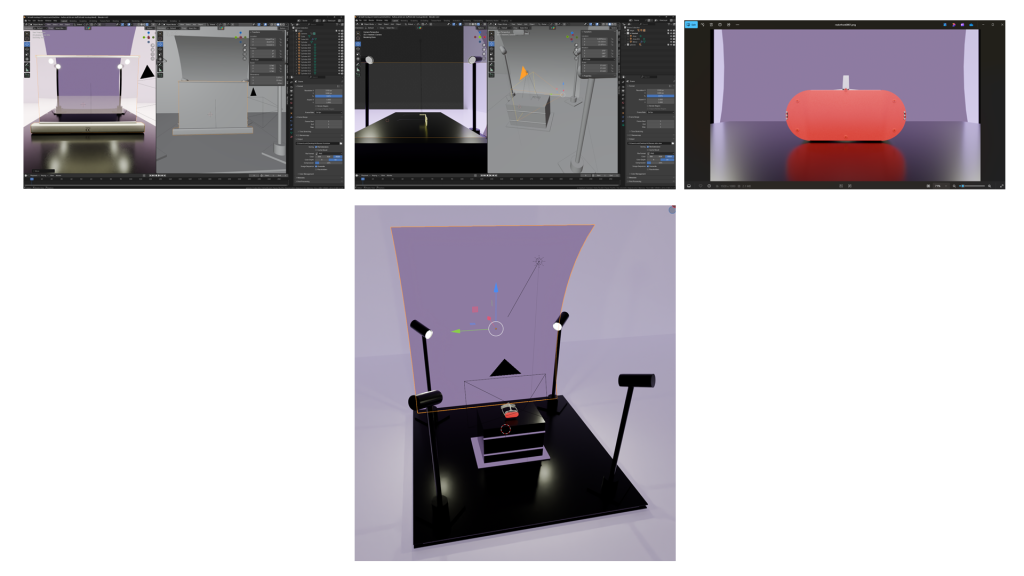
For the final stage of my design process, I aimed to present both the venue stall and the product range as premium and futuristic. To achieve this, I chose a violet and black colour scheme for the stall, which provided a high-contrast, modern aesthetic. Behind the main display, I installed a digital stand that dynamically changes to showcase the logo of each product. This feature visually reinforces product identity while maintaining a cohesive brand presence. The overall lighting within the venue also adapts to each product’s colour scheme—purple for the VR (Virtual Reality) headset, yellow for the AR (Augmented Reality) glasses, and red for the RealGlass product. These dynamic lighting cues serve to differentiate each item while maintaining brand consistency through the shared purple-toned background.
In terms of environmental lighting, I used a large area light to illuminate the full scene, creating consistent and ambient lighting across the venue. Additionally, individual light sources were positioned strategically on the table to highlight the products. A fourth moving light was introduced, created using a plane mesh with emission properties enabled. This allowed for dynamic lighting reflections and added visual depth to the overall scene by casting moving highlights across the product surfaces.
The final visual output closely aligns with my storyboard plans, with only minor alterations. These changes were necessary for practical and aesthetic reasons, but the overall structure remains faithful to the original concept. The intention was to keep the promotional visuals simple and effective, suitable for short-form video advertisements.

Through this process, I also discovered the advantages of using real-life object references in 3D modelling. I photographed my own glasses and used them as a base template. By modifying features such as the top plastic section to accommodate internal components, I achieved a more realistic and functional final model.